
Improve your video quality on a budget by prioritizing clear audio, steady framing, soft lighting, a tidy background, and simple editing.
Professional-looking video does not require a studio, expensive camera, or complicated production team. For YouTubers, podcasters, small businesses, and independent creators, a few deliberate improvements can make content easier to watch and more engaging.
Start with the elements viewers notice most: understandable sound, flattering light, a stable shot, and a distraction-free setting. Then use affordable or free editing tools to remove pauses, add captions, and keep the pace focused. These practical video production upgrades can help you create polished content without exceeding a modest budget.
Use Multiple Camera Angles to Keep Videos Engaging
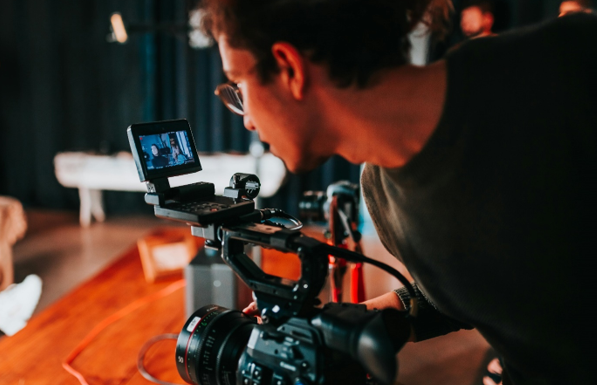
A second angle can make a product demo, podcast, tutorial, or talking-head video feel more dynamic without requiring expensive equipment. Change the framing when you introduce a new idea, demonstrate a detail, or need to hide an edit.
A multi-camera recording setup does not have to include several professional cameras. Start with the devices you already own:
- Combine available cameras. Use a smartphone as your main camera and add a webcam, compact camera, DSLR, or mirrorless camera for a second perspective.
- Give each camera a clear purpose. Use one wide shot for the overall scene and a closer shot for facial expressions, product details, or demonstrations. Keep the cameras on the same side of the subject to avoid confusing changes in screen direction.
- Match the basic settings. Set similar resolution, frame rate, and white balance when possible. Consistent settings make cuts between cameras look smoother.
- Keep framing and focus steady. Mount each device securely, check that the subject remains in focus, and leave enough space around the frame for natural movement.
- Synchronize before editing. Clap once at the beginning or use another clear visual and audio cue. Align that cue in your editor, then switch angles at natural pauses or changes in the content.
Even one additional angle can cover jump cuts and add visual variety. If you are recording alone, test every device first to confirm that the cameras capture the full scene and that the audio remains synchronized.
Improve Video Audio With an Affordable Microphone and Quiet Setup
Clear audio is one of the fastest ways to make budget video content sound more professional. Viewers may overlook imperfect video, but distracting hiss, echo, or uneven volume can make a video difficult to follow.
You do not need an expensive studio microphone to improve your recording. Start by placing the microphone close to your mouth, then control the room noise before you press record.
- Choose an external microphone. An affordable lavalier microphone can clip to your clothing, while a USB microphone works well for desk-based videos, livestreams, podcasts, and voiceovers.
- Position the mic correctly. Keep it close enough to capture your voice clearly, but avoid placing it directly in front of your mouth where breathing and harsh consonants may become prominent.
- Reduce background noise. Close windows, silence phone notifications, and switch off fans or air conditioners when practical. Record a short test to identify unwanted hum before filming the full video.
- Control room echo. Soft furnishings such as curtains, rugs, sofas, and blankets absorb reflections better than bare walls and hard floors. Move away from empty corners when possible.
- Set consistent recording levels. Check that your voice is loud enough without distorting, and use headphones to catch clipping, buzzing, or intermittent connections during the test recording.
- Clean up the track during editing. Noise reduction, high-pass filtering, and light compression in tools such as Audacity can help, but heavy processing may make speech sound unnatural.
Listen to the finished audio on headphones and speakers before publishing. Clear, balanced speech helps viewers understand your message and gives even simple video production a more polished, trustworthy feel.
Improve Video Lighting with Affordable, Simple Tools
Good lighting can make an affordable camera look more polished by keeping your face evenly exposed, reducing harsh shadows, and separating you from the background. You do not need a studio setup: a window, a low-cost LED or ring light, and a simple reflector can make a noticeable difference.
Use a Window or Ring Light as Your Key Light
- Face a window. Position your camera between you and the window so the light falls across your face. Avoid placing the window directly behind you, which can leave you looking dark. If daylight is part of your setup, record near a window during the day and keep your position consistent.
- Choose a ring light for convenience. A ring light provides soft, even illumination and is useful for talking-head videos, livestreams, tutorials, and video calls. Place it slightly above eye level and adjust the brightness before recording.
- Diffuse hard light. If a lamp or LED panel creates sharp shadows, soften it with a diffuser designed for lighting equipment. Do not cover hot bulbs with fabric or paper, as they can become a fire hazard.
Soften Shadows with Low-Cost Reflectors
A white poster board, foam board, or clean white sheet can bounce light back toward the darker side of your face. Place the reflector opposite the main light source and move it closer or farther away until the shadows look natural. A light-colored curtain can also reduce the intensity of direct sunlight without blocking the window completely.
Check Your Lighting Before You Record
Look at a short test clip rather than relying on your eyes in the room. Make sure your face is bright enough, the background is not distracting, and the light does not flicker or shift during the shot. Lock your camera’s exposure and white balance when possible, then mark the positions of your camera and lights so you can recreate the setup later.
Create a Clean, Purposeful Video Background
A professional-looking video setup does not require a dedicated studio. A tidy corner of a bedroom, office, or living space can work well when the background supports your subject instead of competing for attention.
- Remove distractions. Clear away laundry, clutter, cables, and anything that pulls the viewer’s eyes away from you. Keep only items that contribute to the setting or your brand.
- Add a few intentional details. A small indoor plant, bookshelf, or framed picture can make the space feel welcoming without overwhelming the frame.
- Choose a simple backdrop. A plain wall, curtain, folding screen, or fabric backdrop can create a consistent filming background. Leave some space between yourself and the backdrop to add depth and reduce harsh shadows.
- Check the frame before recording. Look for bright windows, reflections, crooked objects, and unwanted items at the edges of the shot. A quick preview can prevent distracting mistakes.
- Keep your setup repeatable. Mark the positions of your camera, chair, and lights with small pieces of tape. You can recreate the same video recording setup quickly each time you film.
Your filming space does not need to be perfect. It should look deliberate, remain visually quiet, and help viewers focus on your message.
Use Free Video Editing Software for a More Polished Finish
Free video editing software can handle the essentials of budget video production: trimming, arranging clips, adding captions, balancing audio, and exporting content for different platforms.
Choose a tool that matches your experience and computer rather than paying for advanced features you may not use:
- iMovie for Mac or Clipchamp for Windows provides a straightforward starting point for cutting clips, adding titles, and making basic adjustments.
- DaVinci Resolve offers a free version with more advanced editing, color, and audio capabilities for creators who want room to develop their skills.
- Shotcut and OpenShot are accessible alternatives for essential edits without a subscription. Check the current system requirements before installing any software.
A Simple Editing Workflow for Budget Video Content
Start by removing pauses, repeated points, mistakes, and sections that do not move the story forward. Then improve the viewing experience with a few purposeful edits:
- Use captions or on-screen text to reinforce important points and support viewers watching without sound.
- Add images, screen recordings, or close-up shots when they clarify the subject or break up a long talking-head segment.
- Adjust the audio so speech is clear and consistent from one clip to the next.
- Keep transitions, effects, and music restrained so they support the message instead of distracting from it.
- Export a short test file and watch it before publishing to check the framing, captions, sound, and overall pace.
You do not need expensive editing software to make professional-looking videos. A clean cut, readable captions, balanced sound, and a focused structure often make a larger difference than elaborate effects. Once the workflow becomes familiar, you can save time by creating a reusable intro, outro, caption style, or export preset for each platform.
For a cost-conscious video setup, prioritize these improvements:
- Capture alternate angles with a phone, webcam, or second camera when they add useful variety.
- Record with an external microphone in the quietest practical location.
- Use a window, ring light, or soft reflector to make the subject easier to see.
- Keep the background tidy and visually relevant.
- Edit for clarity and pacing with free video editing tools before buying premium software.
- Adapt the finished video into shorter clips, captions, or platform-specific versions where appropriate.
Practice matters more than complexity. With a repeatable editing process, even a low-budget recording can feel deliberate, clear, and ready to share.